Honeycomb Wall Module: Detailed manual
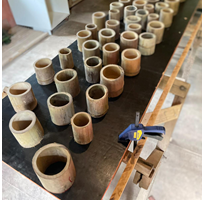
Bamboo stubs of different Ø dimensoin but with equal height, placed randomly on a board. Even split stubs work.
A wall panel 60 x 240 cm, is built flat on a bench. 60 cm is a common width for a module to be handled by two people. 240 cm is a common ceiling height, although optional. In a hot, tropical climate without AC, a higher ceiling is usually desired. A final module weight of max 50-60 kg is practical for the wall assembly without lifting machinery.
Bamboo stubs are cut according to the standard wall thickness chosen: 7-15 cm? They are almost randomly placed on top of a planar board, like an OSB. Even broken stubs can be used if having the same length. The number of stubs needed depends on the density desired. If placed side by side, the impact resistance becomes extremely high, whereas if reduced by 50%, the wall could still be strong enough. A practical evaluation of different stub densities is worthwhile for project economy.
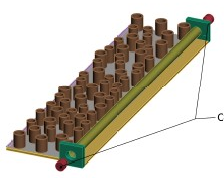
Later on centering of the load bearing culm with cones in rig (green).
When positioning the stubs on the board, a 10 cm wide space is left on one of the long side of the module for a vertical loadbearing culm to be included later on. 3-4 stubs should line up next to this space for later fixing to the culm.
Likewise, 2-3 stubs should line up on the upper and lower sides of the module for later fixtures to floor and ceiling.
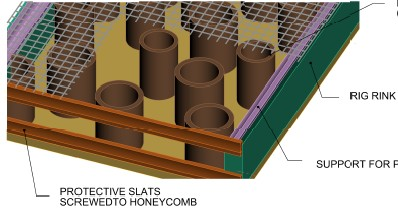
Rig rink (green), lower side here removed for viewing details.
Protective slats screwed to stubs later on.
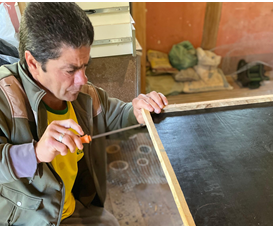
On top of all the bamboo stubs now placed on the OSB, a fine meshed chicken net is stapled, with at least three staples on every stub. A completely flat and stiff galvanized plaster net with a mesh 20x20 mm, would be better.
(Although difficult to find in Brazil) The whole cluster of stubs can then be lifted off the OSB, flipped upside down and placed on the floor.
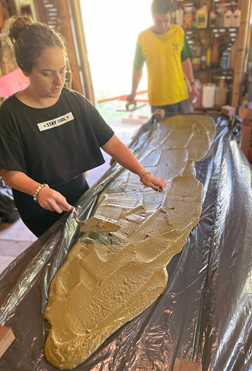
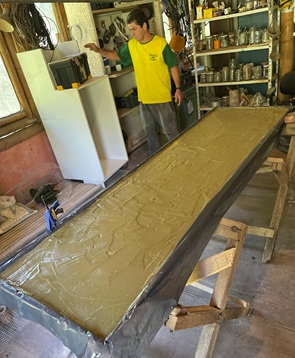
The board must now be equipped with "rinks", which are simply lists with a 1 - 2 x 3-6 cm section, fastened with screws along all the sides of the OSB. The rink, will now form a pool to contain the liquid mortar mix. To achieve a smooth final surface of the wall, a plastic film is placed on the bottom of the pool also covering the rinks.
Ebiobambu, Visconde de Mauá, Brazil Nov 2025
The board must be level for equal thickness of the
exterioir skin.
The plaster mix should now be prepared with the volumetric proportions 1 cement to 3-4 sand. The sand must be sifted to avoid over-size gravel stones sticking out. If color pigmenting is planned, it should now be added to the dry cement/sand mix.
A small-scale sample mixed with water for evaluation is now worthwhile to get the proportions right.
When cement, sand and pigments have been thoroughly mixed in a clean bucket, water can now be added, little by little, so as not to ruin the plaster mix by too much water. The total volume of the plaster liquid should be calculated as 60x240x1cm=14,400 cm3=14.4 liters. Only trial and error can determine this parameter. The final plaster skin could be much thinner than 1 cm, maybe down to 0.6 cm, in which case the total plaster volume is adjusted accordingly.
Make sure that the board is perfectly level so that the wet mix is spread with equal thickness all over. A vibration device facilitates this: A stick screwed to the plate of a grinding machine going back and forth, makes enough vibration of the OSB board and the plaster pool.
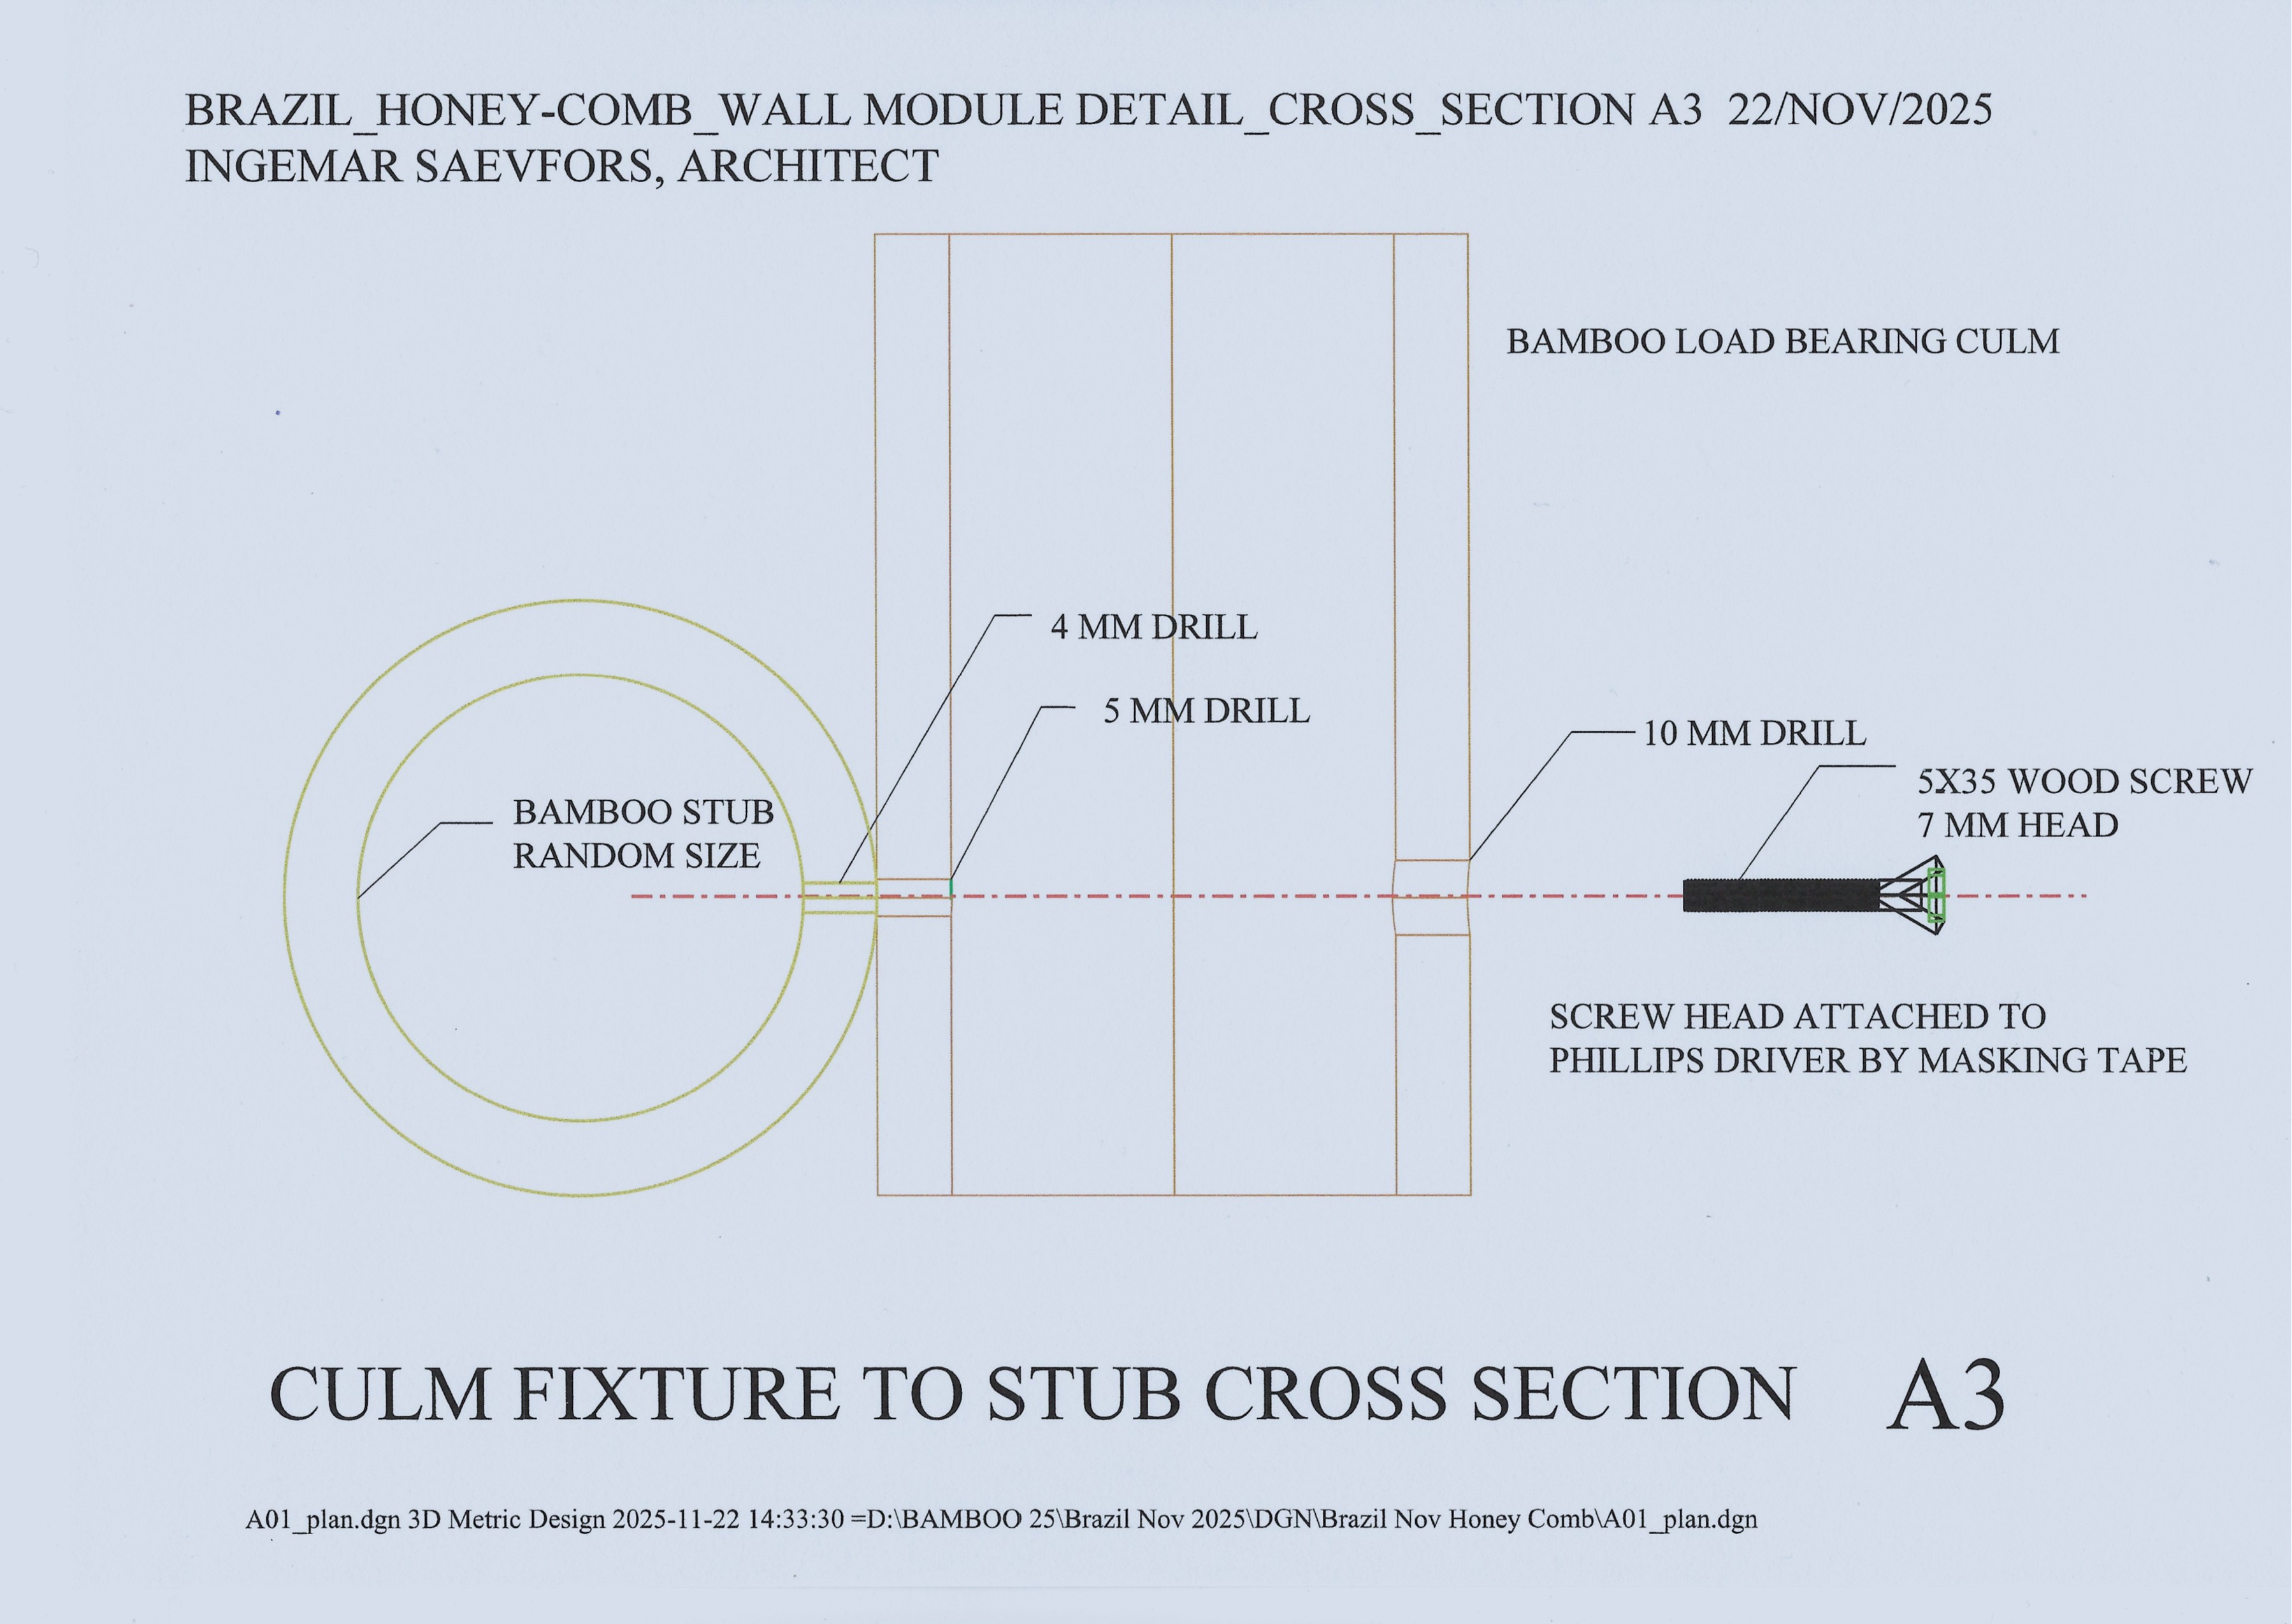
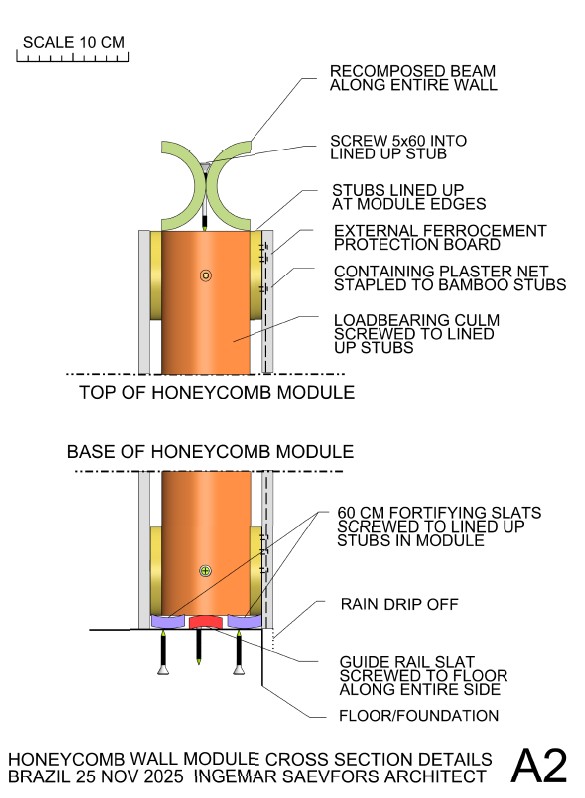
Cross Section: Fastening load-bearing culm to lined-up stub. Refer to "Centering" perspective, to the left.
After 1-2 days, when the cement has hardened, the honey-comb wall module can be lifted and separated from the OSB-board-pool and the plastic film. The load bearing culm can now be fixed to the 3-4 stubs lined up.
All holes in the culm should be drilled from outside before assembly. The Ø10 mm holes first, then the Ø5 mm holes. To find their mirrored positions, a paper can be wrapped around the load bearing culm at the Ø10 mm hole. The culm circumference is measured and divided by 2 to find the position of the Ø5 mm hole. Finally, when the loadbearing culm has been positioned at the center-line of the wall module, the Ø4 mm holes are drilled in the receiving 3-4 stubs.
To finalize everything, a 35xØ5 mm screw with a Ø7 mm large head is fixed to a Philips screwdriver with masking tape. Then it is entered through the 10 mm and the 5 mm holes to finally drive the screw into the 4 mm hole in the stub, here acting as a nut!
Preferably this culm should have been fixed at the center axis of the honeycomb wall module seen from above (in plan view).
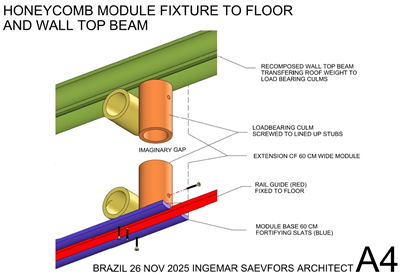
The bottom end of the honeycomb module should be fortified with 60 cm bamboo protective slats under both edges of the stubs, drilled and screwed. See detail cross section A2. Between those two slats there will be a guide rail, which is also a slat but fixed to the floor. This guide rail runs along the entire floor edge. This way the honeycomb module will fit snugly to the other adjacent modules.
Fig: Honeycomb wall panel cross-section with external ferro-cement skin protecting against rains, UV ( sun), fire hazards, mosquitos...Optional interior cladding.
The red guiding rail has to be fixed to the concrete (presumably) floor before mounting the wall modules.
The upper side of the same module should be fixed to a recomposed beam, 6-8 cm high running on top of the entire wall, maybe 4-5 meters long. This fixture could be just a 6 cm screw going through the beam and then entering the lined-up stubs. After initial markings by a few turns of the drilling machine, Ø4 mm bore holes in the stubs may be necessary to avoid splitting by the screws.
This recomposed top beam distributes the weight of the roof structure down to the load bearing culms.
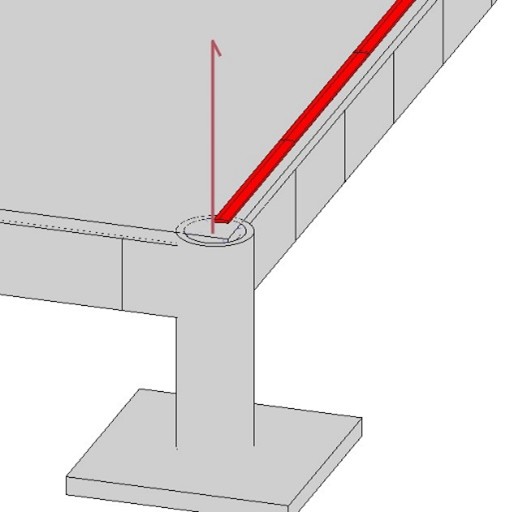
The red guiding rail slat has to be fixed to the concrete (presumably) floor before mounting the wall modules.
From another manual (KnockedDown): Focus_2_Foundation (available on request):
The very first bamboo item to install on the construction site is called Guide Rail (red). This slat of approximately 40x10 section has to be nailed, or fixed with expander bolts, to the foundation/ floor with accuracy. It should follow the foundation/floor edge in a straight line. See details for precise measures.
First of all, drill holes in the bamboo slat for nails or bolts to avoid cracks.
This Guide Rail will secure that all Honeycomb wall panels land in their right positions.
↑ Back to Top
Website under reconstruction - updates mostly on a daily basis.